
Plumbers Tweed Heads Near You in 2025
Rainwater Harvesting System Setup
Rainwater harvesting systems are becoming increasingly popular in Australia as homeowners and tradespeople work together to address water scarcity and reduce reliance on mains water. Whether you’re a DIY enthusiast or a professional installer, understanding the ins and outs of rainwater systems is essential for maximizing efficiency, cost savings, and environmental benefits. This article explores rainwater systems from two perspectives: the homeowner’s DIY journey and the tradesperson’s technical expertise, addressing common questions and curiosities along the way.
Part 1: The Homeowner’s Guide to DIY Rainwater Systems
Why Install a Rainwater System?
For Australian homeowners, rainwater systems offer a practical solution to reduce water bills, increase self-sufficiency, and contribute to sustainable living. Rainwater can be used for gardening, irrigation, washing cars, and even indoor non-potable uses like flushing toilets and laundry (with proper filtration). But where do you start?
Key Questions Homeowners Ask:
- What type of system is best for my needs?
- Basic: A simple rain barrel (200 –1,000 litres) for garden use.
- Intermediate: A larger tank (2,000 –20,000 litres) with a pump for irrigation or outdoor cleaning.
- Advanced: A fully integrated system with filtration for indoor non-potable uses (e.g., toilets, laundry).
- How much space and budget do I need?
- A single rain barrel requires minimal space and costs around AUD 100 –300. Larger systems, including tanks and pumps, can range from AUD 1,000 to10,000+ depending on the size and complexity.
- What tools and skills are required?
- Basic tools like a drill, hacksaw, and PVC cutters, along with a weekend of time, are sufficient for a simple setup. For more advanced systems, some plumbing knowledge is helpful.
Step-by-Step DIY Setup:
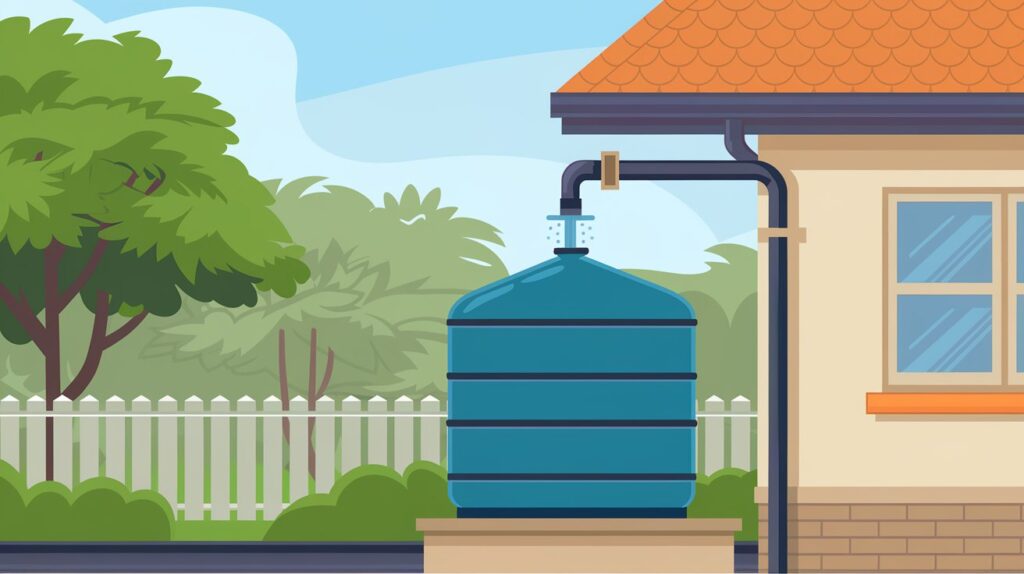
- Gutter Preparation: Install gutter guards or screens to filter out leaves and debris.
- Tank Placement: Choose a location close to downpipes for easy connection. Elevate rain barrels for gravity-fed flow or place larger tanks on a stable, level base.
- Piping & Diverters: Connect downspouts to the tank using PVC pipes and install a first-flush diverter to discard the initial dirty water.
- Pump & Filtration: For irrigation or indoor use, add a submersible pump and filtration system to ensure clean water.
- Overflow System: Install an overflow pipe to direct excess water away from your home’s foundation.
Common Concerns:
- Maintenance: Regularly clean gutters, inspect filters, and check for leaks.
- Water Quality: Use appropriate filtration for intended uses. Rainwater is not suitable for drinking without advanced treatment.
- Council Regulations: Check local council guidelines for tank size, placement, and usage restrictions.
Part 2: The Tradesperson’s Perspective on Rainwater Systems
Why Recommend Rainwater Systems?
For tradespeople, installing rainwater systems is not just a service—it’s an opportunity to help clients save money, conserve water, and meet sustainability goals. With Australia’s variable climate and frequent droughts, rainwater systems are a smart investment for many households.
Key Questions Tradespeople Address:
- What systems are available, and how do they differ?
- Plastic Tanks: Lightweight, affordable, and available in sizes from 1,000 to 20,000+ litres. Prices range from AUD 500 to 5,000.
- Steel Tanks: Durable and long-lasting, ideal for larger capacities. Costs range from AUD 1,000 to10,000+.
- Bladder Tanks: Flexible and space-saving, perfect for under-deck or underground installation. Prices start around AUD $1,500.
- What additional components are needed?
- Pumps: Submersible pumps (AUD 200 – 800) or pressure pumps (AUD 500 1,500) for irrigation and indoor use.
- Filtration: Basic mesh filters (AUD 50 –200) for outdoor use, or advanced systems (AUD 500 –2,000) for indoor non-potable applications.
- First-Flush Diverters: Essential for improving water quality (AUD 100 – 300).
- What are the installation costs?
- Basic systems: AUD 1,000 – 3,000 (including tank, pump, and labour).
- Advanced systems: AUD 5,000 –15,000+ (including filtration, plumbing, and integration with household systems).
- What about insurance and warranties?
- Most tanks and components come with manufacturer warranties (5–25 years).
- Tradespeople should have public liability insurance (AUD 10 – 20 million coverage) to protect against installation errors or accidents.
Tips for Tradespeople:
- Assess the Site: Evaluate roof size, rainfall patterns, and water usage to recommend the right system.
- Educate Clients: Explain the benefits, maintenance requirements, and potential savings.
- Stay Compliant: Ensure installations meet Australian Standards (AS/NZS 3500.5) and local council regulations.
Conclusion: Rainwater Systems for a Sustainable Future
Whether you’re a homeowner looking to install a rainwater system yourself or a tradesperson offering professional installation services, rainwater systems are a win-win for Australian households. They provide a reliable water source, reduce reliance on mains water, and contribute to a more sustainable future.
For homeowners, starting small with a rain barrel or investing in a larger system can make a significant difference. For tradespeople, offering expertise and high-quality installations can help clients achieve their water-saving goals while growing your business.
By addressing common questions and concerns, this guide aims to empower both homeowners and tradespeople to make informed decisions about rainwater systems. After all, every drop counts!
Leave a Reply